Shift Type
The Shift Type document allows you to define the different types of Shifts in your Organization and set up auto attendance for the shift. Auto attendance marks attendance based on Employee Checkin records for employees assigned to a shift.
To access Shift Type, go to:
Home > Human Resources > Shift Management > Shift Type
- Click on New.
- Enter the Shift Name, Start Time and End Time
- Save
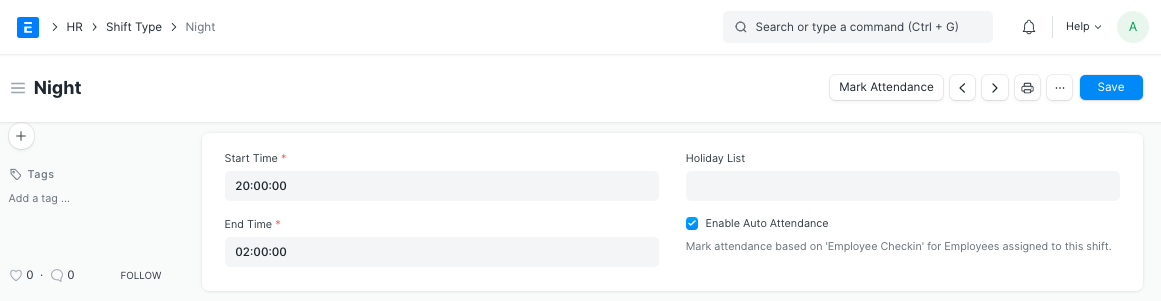
In addition to defining the different shifts in your organization, the Shift Type document also has settings for auto attendance. Auto attendance marks the attendance for the employees assigned to this shift based on records in the 'Employee Checkin' Document. Auto Attendance for all shift type records is attempted to be marked every hour. You can also trigger the auto attendance manually for a single shift type by pressing the 'Mark Attendance' button in the shift type document.

1. Basic Set Up
- Start Time: The time of the day when this shift starts. The time is to be entered in a 24Hrs format.
- End Time: The time of the day when this shift ends. The time is to be entered in a 24Hrs format.
- Holiday List: The applicable holidays for this shift can be selected here. If left blank, the default holiday list from the employee master or the company document is taken into account. Attendance is not marked via the scheduler if it's a holiday.
- Enable Auto Attendance: You can use this option to enable marking attendance for the employees assigned to this shift based on their Employee Checkin records.
Note: For cases where the 'End Time' is less than 'Start Time', the shift is assumed to be a night shift that starts on one calendar date and ends on the next calendar date.
2. Auto Attendance Settings
You can use the following settings to configure the Auto Attendance as per your requirements:
Determine Check-in and Check-out: This setting determines how your check-in logs should be interpreted by the auto attendance system.
- Alternating entries as IN and OUT during the same shift: The first entry is taken as IN followed by the next entry as OUT and the following entry as IN and so on. Employee Check-in may not always have an IN/OUT log type. Not all biometric devices return Log Type for every log. For such scenarios you can use this option.
- Strictly based on Log Type in Employee Checkin: The check-in is determined as IN or OUT strictly based on the 'Log Type' in the Employee Checkin record. This should be used when the logs that are being recorded in Frappe HR have the exact log type.
Working Hours Calculation Based On: Working hours can be calculated either by including the breaks in between the shift or by excluding the breaks. This can be configured using the following options:
First Check-in and Last Check-out:
- Use this option when you want to include breaks or all out/in entries in your working hours.
- Selecting this option calculates the working hours by considering the first IN and last OUT Employee Checkin during the shift. The time difference between the two is considered as the actual working hours.
- In case the IN/OUT is determined by alternating entries then the first Employee Checkin is considered as IN and the last Employee Checkin is considered as OUT for the purpose of calculating working hours.
Every Valid Check-in and Check-out:
- Selecting this option excludes the time during which the Employee is checked out.
- i.e. Only the time during which the employee is checked in is calculated as working hours.
- Begin check-in before shift start time (in minutes): Often employees would check-in a few minutes before the shift start time. To consider these check-ins as part of the shift during the calculation of working hours and marking attendance, you can set up this value accordingly.
- Allow check-out after shift end time (in minutes): Often employees would check-out after the shift end time. To consider these check-outs as part of the shift during the calculation of attendance, you can set up this value accordingly.
- Mark Auto Attendance on Holidays: If enabled, auto attendance will be marked on holidays if Employee Checkins exist on that date. By default, auto attendance is skipped on holidays.
- Working Hours Threshold for Half Day: If the actual number of working hours is less than the given value in this field then the employee attendance is marked as 'Half Day'. If you never want to mark Half Day based on working hours, you should set this value to zero.
- Working Hours Threshold for Absent: If the actual number of working hours is less than the given value in this field then the employee attendance is marked as 'Absent'. If you never want to mark Absent based on working hours, you should set this value to zero.
- Process Attendance After: The date from which 'Auto Attendance' should start marking attendance. You should set it to a date after which you have Employee Checkin records for this shift.
- Last Sync of Checkin: This is the timestamp up to which Employee Checkin records have been synced. This field has to be updated by the script/person(in case of manual entry) making the Employee Checkin Records. If your logs are automatically pushed to Frappe HR using the sync tool, this timestamp will automatically be updated for you. You should set this to a date and time up to which the Employee Checkin has been synced.
- Automatically update Last Sync of Checkin: In case of a single biometric device, or check-ins through the mobile app, you can enable this to let the system take care of auto updating your last sync of checkin so that no scripting or manually updating this timestamp is required.
3. Late Entry & Early Exit Settings for Auto Attendance
- Enable Late Entry Marking: Selecting this option marks those Attendance records with Late Entry wherein the employee's In Time exceeds the permissible In Time.
- Late Entry Grace Period: Adds additional grace period in minutes to the Shift Start Time after which entries are marked as late.
- Enable Early Exit Marking: Selecting this option marks those Attendance records with Early Exit wherein the employee's Out Time falls short of the permissible Out Time.
- Early Exit Grace Period: Adds additional grace period in minutes to the Shift End Time before which exits are marked as early.