Employee Checkin
Employee Checkin is used to keep a log of all the check-ins and check-outs of an employee in the organization. Most organizations use this for attendance, shift management, and working hours calculations.
1. Prerequisites
To create an Employee Checkin, you need to first create:
If you want shifts to be determined in employee checkins and want to process auto-attendance, then you need to create the following documents too:
Shift Assignment or set a default shift in Employee master.
2. How to create an Employee Checkin
2.1 Creating logs manually
To create a new Employee Checkin go to:
Human Resources > Attendance > Employee Checkin
Click on New.
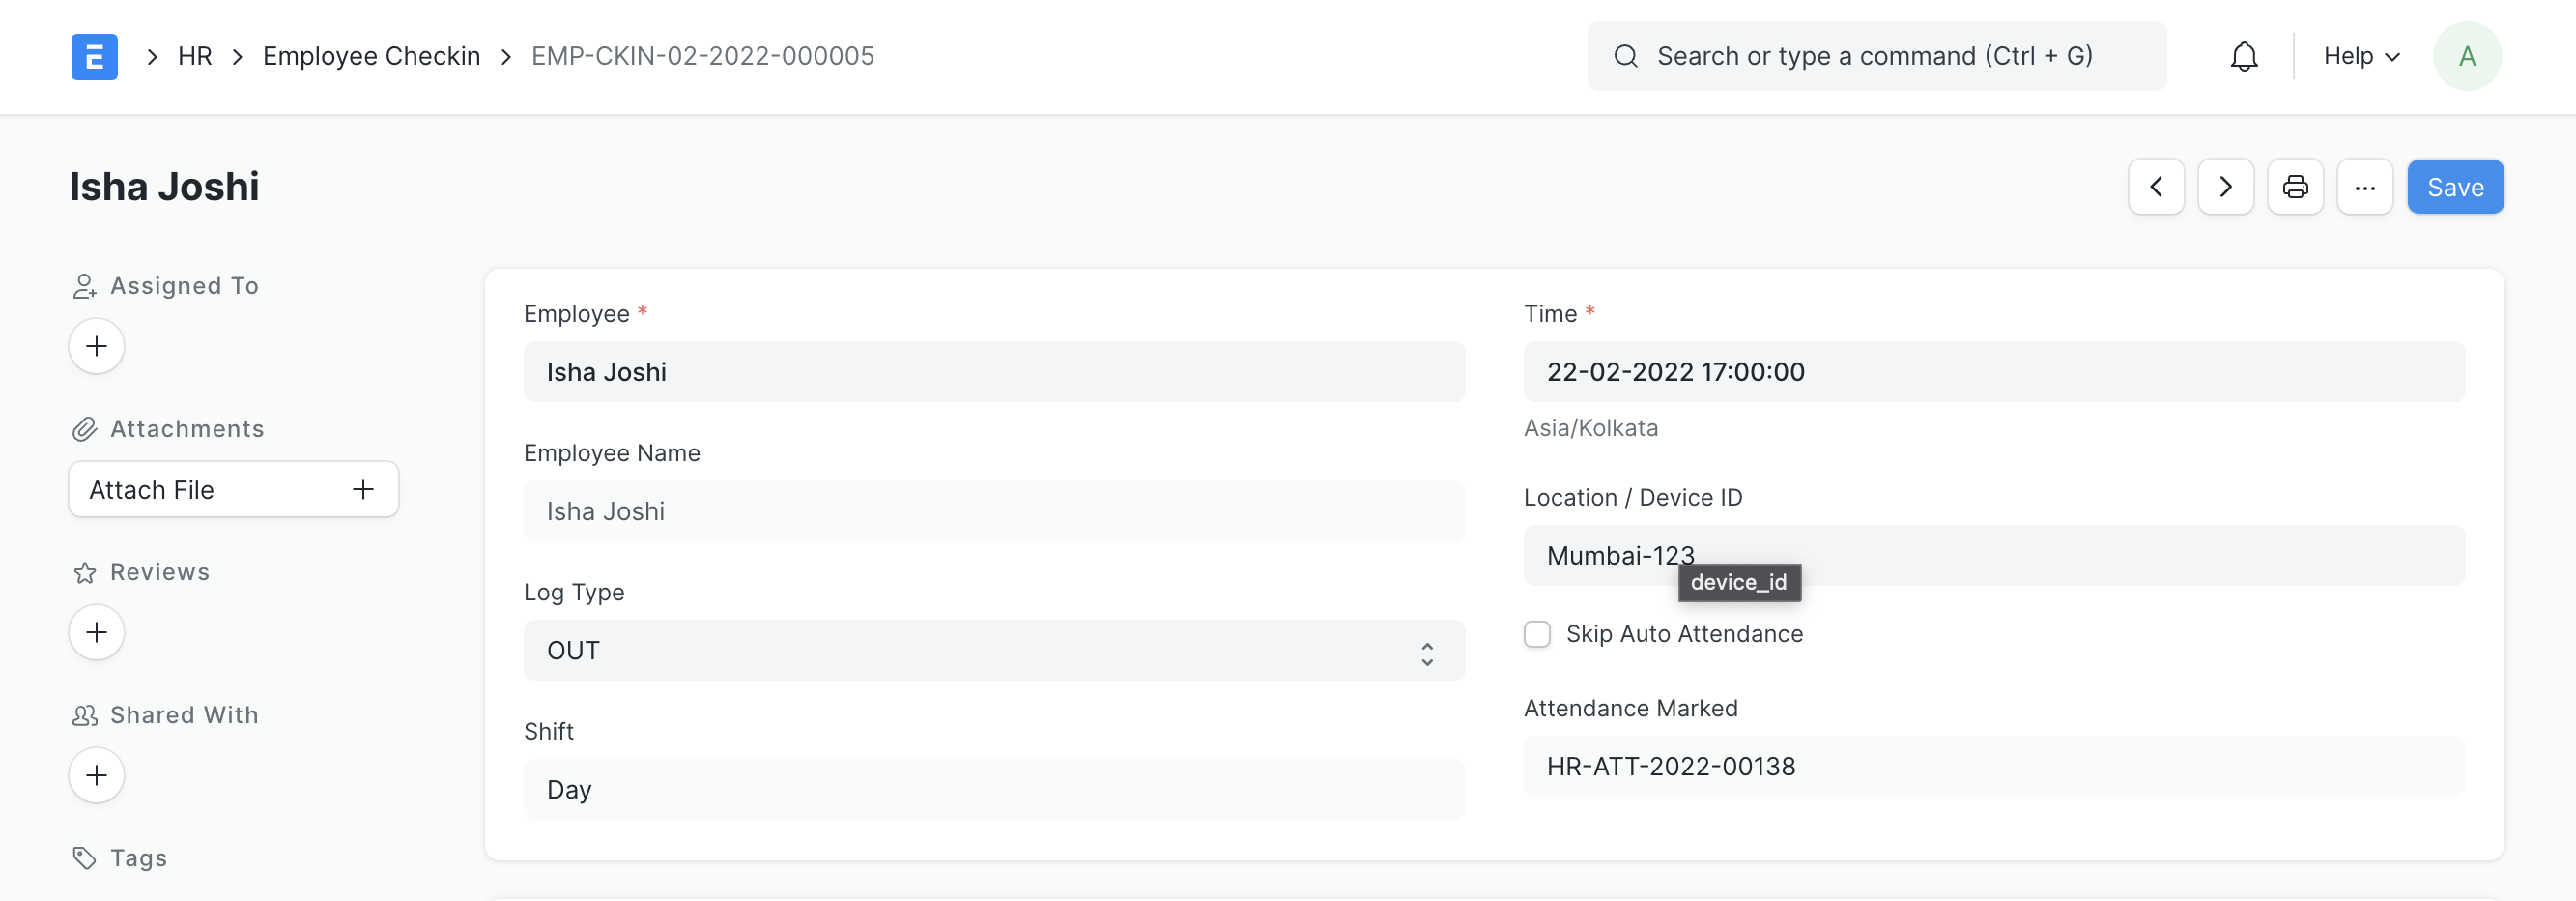
Select the Employee.
Set the date and time for the log.
Set Log Type as IN/OUT.
Save.
If you have set up shifts and shift assignments, the Employee Checkin will set the appropriate shift in which the timestamp falls after saving.
You can enable Skip Auto Attendance to skip that record while marking attendance.
You can also capture the location from where the employee has checked in or the Biometric Device ID.

If auto attendance is enabled, the attendance record marked for a set of check-ins will be linked to the document later.
2.2 Integrating Frappe HR with Biometric Devices
If you are using a Biometric Device to log employee check-ins and check-outs you can use it to create records in Frappe HR. You can read more about this here.
3. Features
3.1 Geolocation Tracking
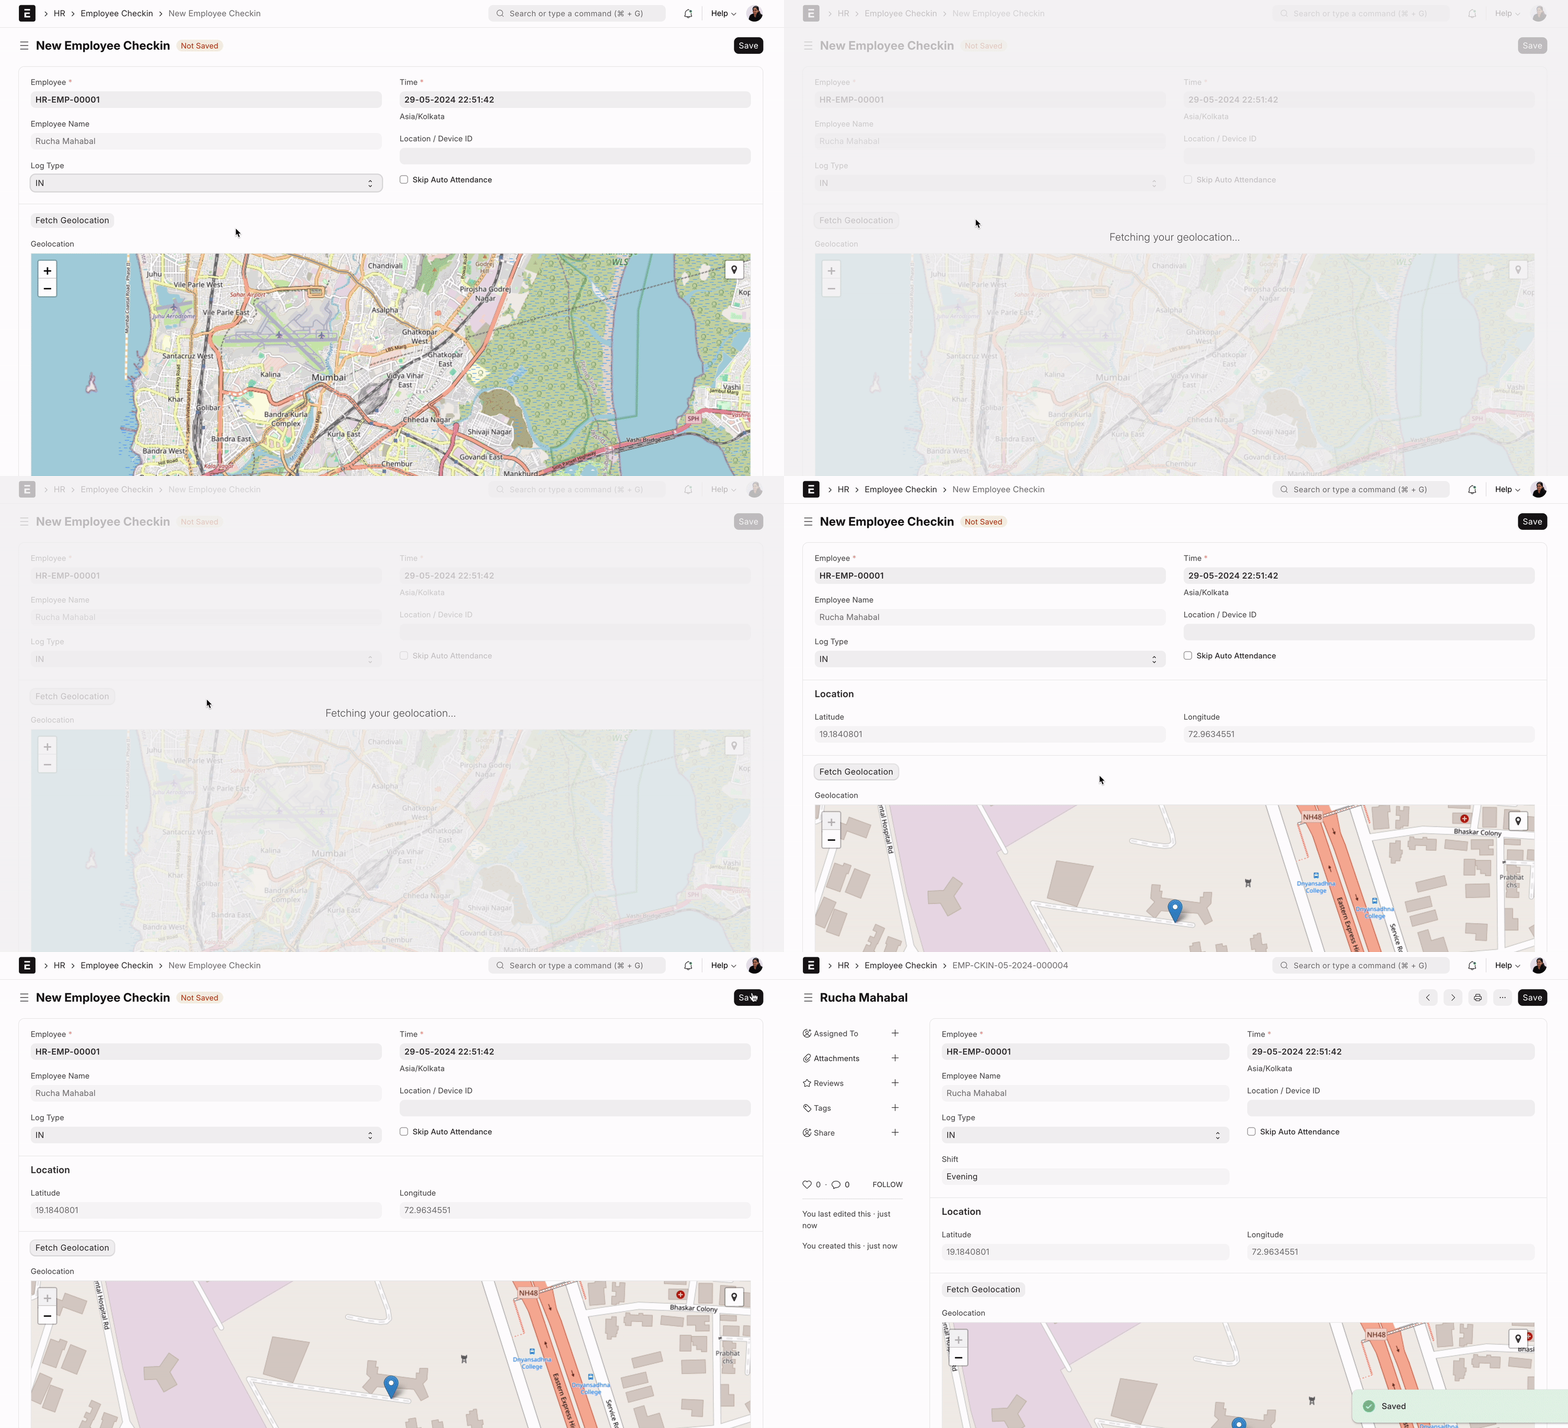
You can also track geolocation in employee checkins. To enable this, go to HR Settings and enable "Allow Geolocation Tracking"

You can then click on the "Fetch Geolocation" button in the check-in form to fetch your current location

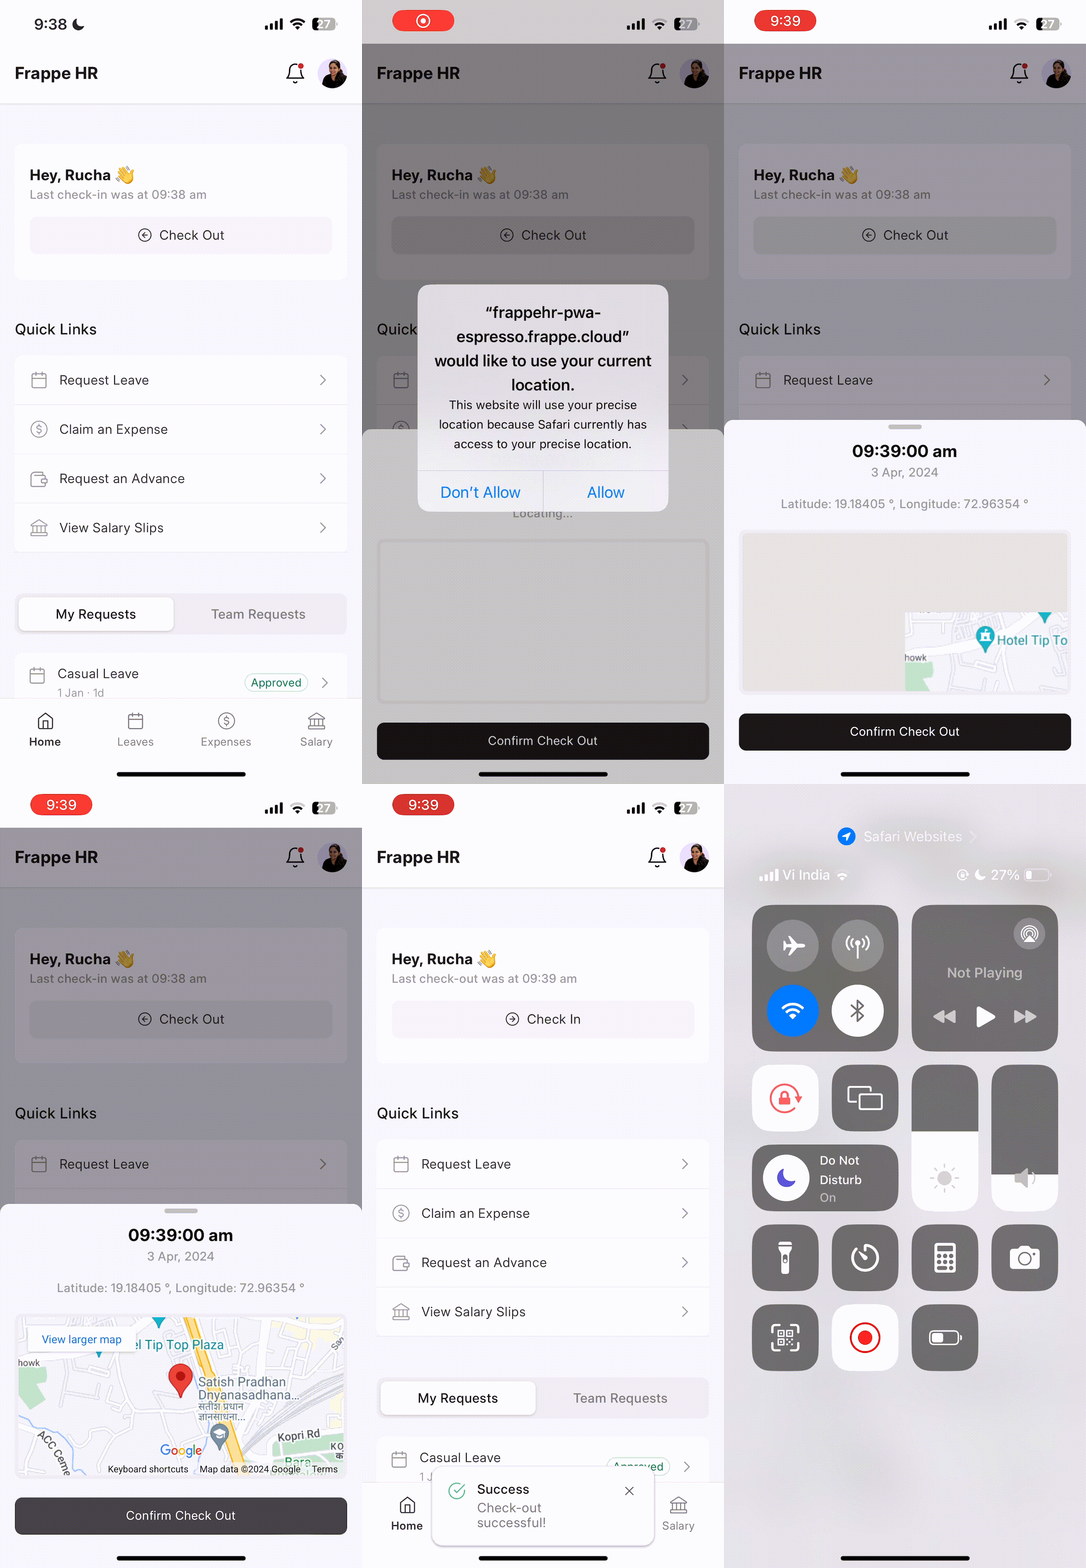
It geolocation tracking has been enabled, it will be automatically captured while checking in from the mobile app too
