Full and Final Statement
When the employee is relieved from the company, all the payables, receivables, and assets allocated to the employee are settled using the Full and Final Statement or Settlement. This statement serves as a checklist to ensure smooth exit procedures with an accounting impact.
1. Prerequisites
Before creating a Full and Final Statement, you need to have an Employee in the system.
This document is created for an Employee who has resigned or is being terminated. Hence it is mandatory to set the Relieving Date for the Employee too.
2. How to create a Full and Final Statement
Go to
Employee Lifecycle > Exit > Full and Final Statement > New.
Select the Employee.
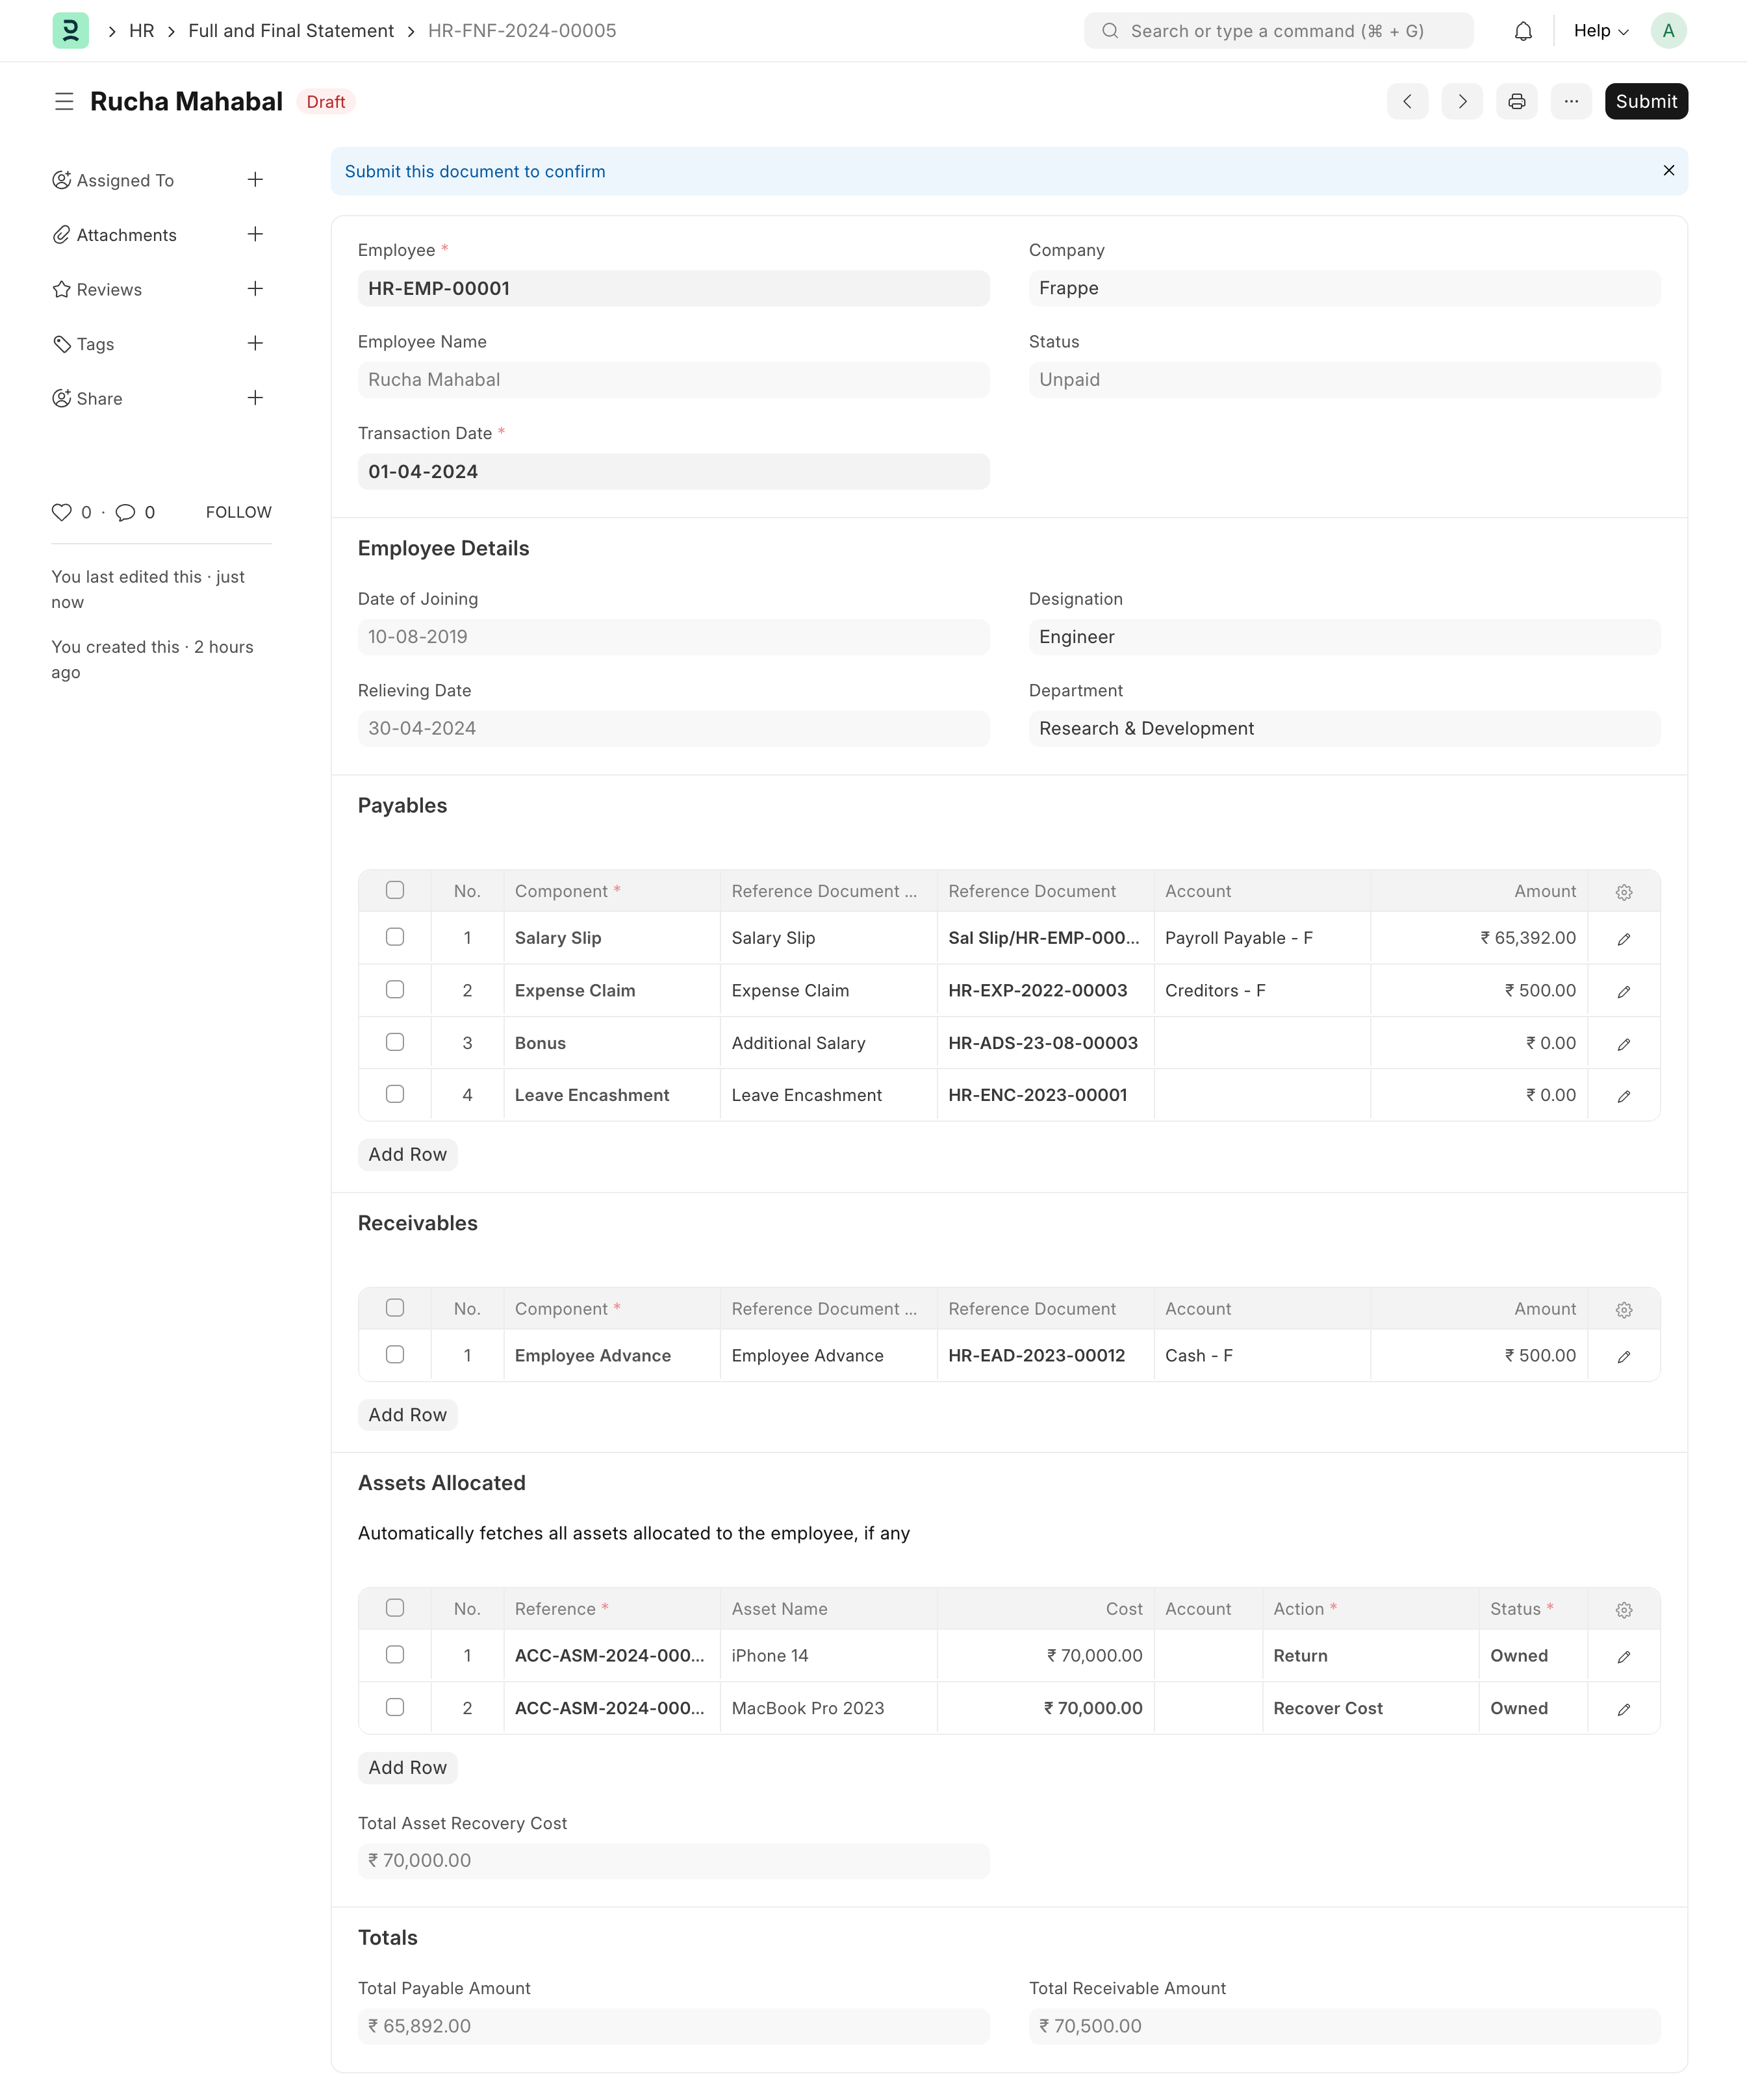
The system will pull in some components and existing documents in payables/receivables:
Payables: Salary Slip, Gratuity, Expense Claim, Bonus, Leave Encashment
Receivables: Loan, Employee Advance
The default status for all these will be Unsettled. Users can then select the respective document against each (like expense claims yet to be settled, bonus(additional salary), etc.) and remove the components that do not require settling.
Users can also add their own components or custom doctypes to this checklist.
The amount and payable account will be fetched if applicable otherwise, it needs to be entered manually.
For eg:
If a loan document is selected, then the payment account is fetched and the amount is set as
Total Payment - Total Amount PaidIf an Employee Advance is selected, then the payment account is set as the advance's payment account, and the amount is set as
paid_amount - (claimed_amount + return_amount)If an Expense Claim is selected, then the payment account is set as the claim's payable account, and the amount is set as
grand_total - (total_amount_reimbursed + total_advance_amount)For gratuity, payable account and amount are fetched as is.
For Salary Slip, the account is set as Payroll Payable Account and the amount is fetched from the salary slip's
net_pay
Based on that the total receivable/payable will be calculated
The system will automatically fetch assets allocated to the employee by the company (eg: laptops, phones, etc). These records are fetched from existing Asset Movement records.
These assets need to be returned to the company or you can also choose to recover the asset cost instead.
The status will be Pending by default. After reviewing all the amounts and accounts, HR can mark all the components in Payables, Receivables, and Assets as Settled.
3. Features
3.1 Asset Cost Recovery
Consider a scenario where you allocate some assets to the employee like laptops/uniforms. In some cases, you might not want to return the asset to the company but instead, recover the asset cost and let the employee own the asset.
You can set "Action" as "Recover Cost" in such cases against such assets. This will add the Total Asset Cost for that asset to the Total Receivable Amount.
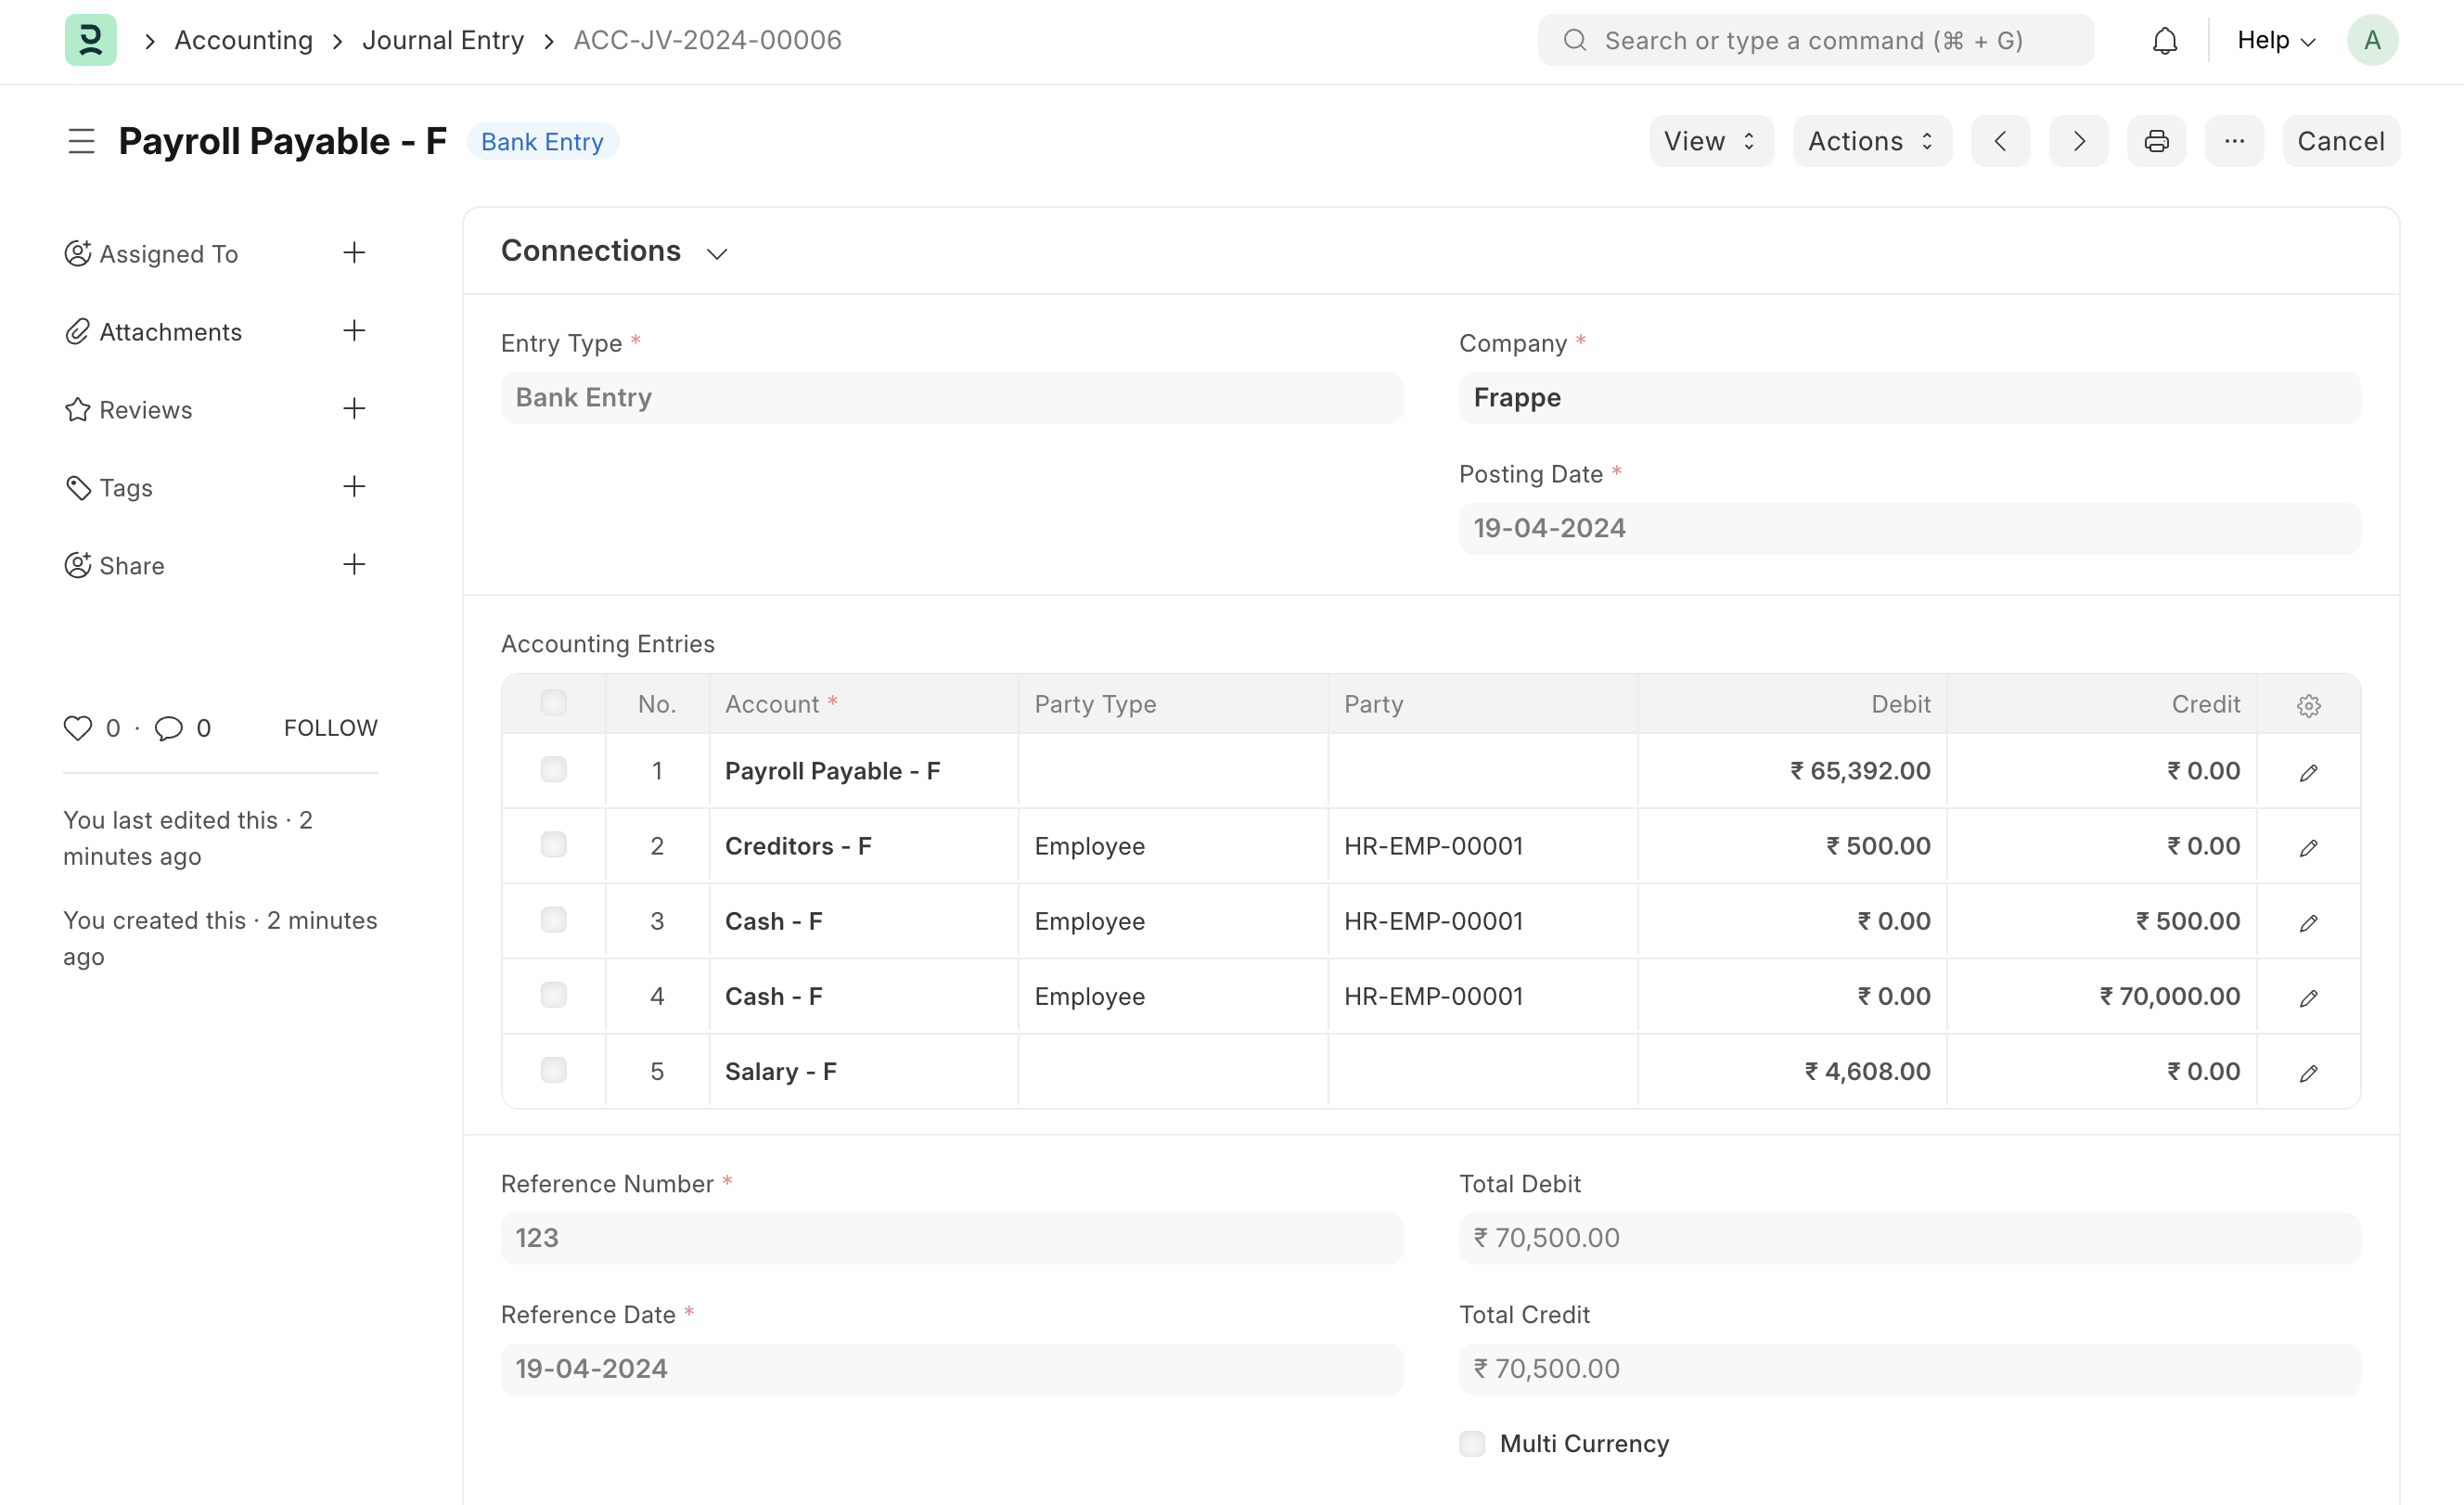
3.2 Settle with Journal Entry
On submission, a button to create a Journal Entry will be shown. Click on Create Journal Entry. This entry is made to record payment from the employee + payment done to the employee hence settling the account.
This will map all your accounts and amounts to your journal entry. Select the final account from where the amount should get created if not already mapped. Save and Submit. The FnF status should then change to Paid.